
Live Meeting Transcription: Transcripts and Study Guides
By the YumiLM Team
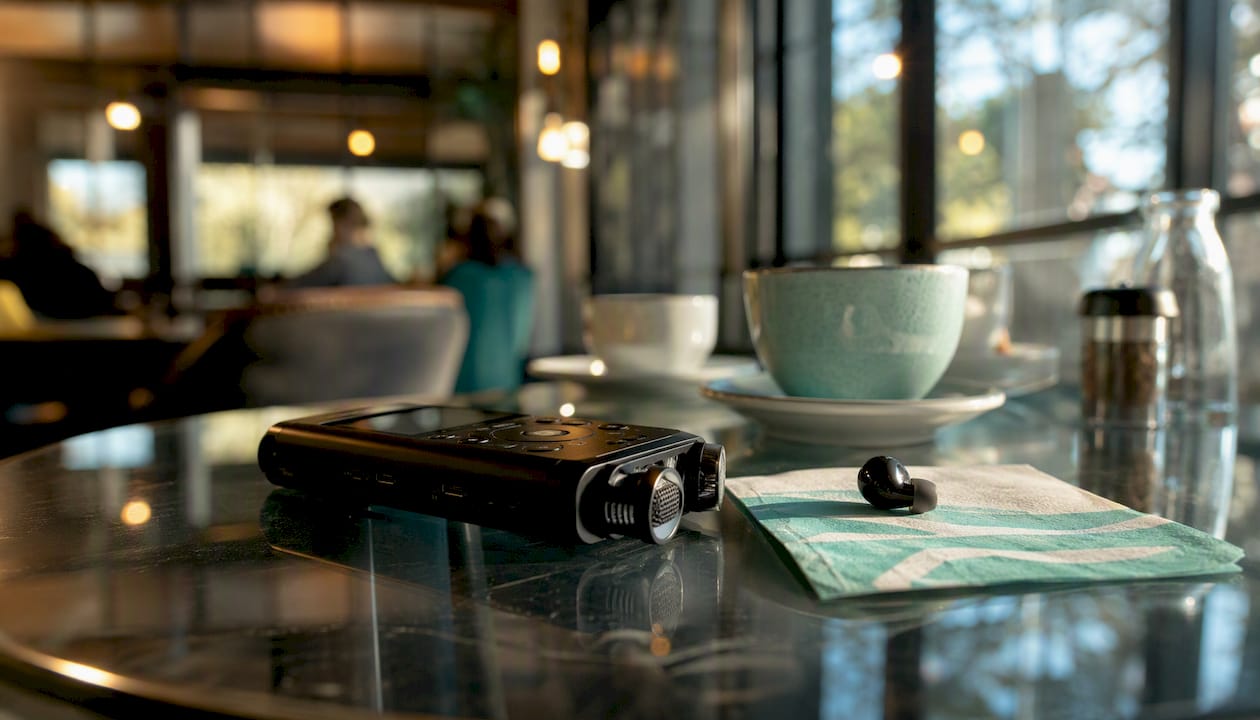
Live meeting transcription, in the context of YouTube videos, uploaded recordings, and live streams, produces a timestamped transcript, SRT subtitle file, translated captions, and a structured Insight Guide in one workflow, with no bot joining the call and no calendar connection required. Start the stream or upload the file, auto-transcribe, run an Insight Guide pass, do a quick human edit, then export as SRT or PDF.
That "no bot" design matters more in 2026 than it used to. Google Meet and Microsoft Teams have both tightened how they handle third-party meeting bots this year: Meet can now flag an unrecognized notetaker bot as a potential risk and deny it entry by default, and Teams' March 2026 policy requires the host to manually admit any bot, now labeled "Unverified," from the meeting lobby before it can join. None of that applies here — YumiLM never joins your call as a bot. It transcribes directly from the live stream or a file you upload afterward, so there's no lobby approval step and nothing for a host or IT admin to whitelist.
What you need before you start:
-
A YouTube URL, a live stream link, or an audio/video file
-
Clear audio with minimal background noise
-
Target language(s) for translation
-
Your preferred citation style (APA, MLA, Chicago) if the output goes into academic work
What you get:
-
A timestamped, searchable transcript
-
An SRT subtitle file and translated captions
-
An Insight Guide PDF organized by key concepts, examples, and a final synthesis
Key Takeaways
Live meeting transcription produces the most value when automated output is treated as a draft and refined through a structured human editing pass before study or publication use.
| Point | Details |
|---|---|
| Prepare audio first | Record at 48 kHz with a cardioid mic; fix noise problems before transcription, not after. |
| Run the Insight Guide pass | Structured guides outperform raw transcripts for study; summaries improve preview-task performance. |
| Always do a human edit | A 10–15 minute QC pass fixes speaker labels, timestamps, and domain terms before any content is published or cited. |
| Check consent and copyright | Verify one-party vs. two-party consent for your state and review FERPA and fair use before distributing any transcript. |
| No bot or calendar needed | YumiLM works directly from a live stream or an uploaded file — no bot joins your call and no calendar connection is required. |
| YumiLM covers the full workflow | Paste a URL or upload a file to get a transcript, SRT, translated captions, and Insight Guide PDF in one session. |
Table of Contents
-
What YumiLM has learned from using live transcription in teaching
-
YumiLM turns your recordings into structured study documents
How does live meeting transcription work, step by step?
This workflow takes under 10 minutes for a 60-minute recording when audio quality is good.
-
Prepare your audio (1 min). Position your mic 6–12 inches from your mouth. Close unnecessary browser tabs to reduce CPU noise on virtual calls. For remote speakers, ask them to use headsets rather than laptop mics.
-
Upload or paste the URL (1 min). Drop a file into YumiLM's upload page or paste a YouTube link into the YouTube transcription tool. For a live stream, connect via the Live Transcribe feature — no bot needs to join the call and no calendar connection is required. See live audio recording transcription for what recording directly from your browser microphone looks like when there's no file to upload yet.
-
Set language and caption length (1 min). Choose your source language and pick a caption line length (32–42 characters works well for most subtitle players).
-
Run auto-transcription (2–5 min depending on file length). The system captures audio, runs ASR, and adds punctuation and timestamps.
-
Run the Insight Guide pass (1–2 min). Select your guide type (study notes, narrative summary, research document) and let the LLM structure the output.
-
Review and export (2–3 min). Skim for low-confidence spans, fix any misheard words, then export your SRT, translated captions, or Insight Guide PDF.
Pro Tip: Record a 30-second test clip before a long session and run it through transcription first. Catching a mic placement or gain problem on a short clip saves you from fixing hundreds of errors later.
A controlled study with about 100 university students found that automatic summaries paired with lecture videos improved performance on preview tasks compared to video alone, which is exactly the workflow this quick start produces.
What does each output actually give you?
Each output serves a different downstream purpose. Choosing the wrong one wastes time.
-
Clean transcript. A full verbatim text with timestamps. Use it for citation-ready excerpts, searchable archives, or feeding into a research database.
-
SRT subtitle file. Timed caption blocks formatted for video players, YouTube, or editing software. Best for publishing a video with accessibility captions or creating social clips.
-
Translated captions. An SRT file in a second language. Use these when publishing to multilingual audiences or when a lecture was delivered in a language your students don't speak natively. Research on ASR combined with contextual summarization shows that multilingual outputs built on strong ASR transcripts carry significantly more comprehension value than machine-translated captions applied to raw audio.
-
Insight Guide. A structured document with key concepts, examples, important moments, and a synthesis section. The right choice for study notes, research memos, or content repurposing.
-
Searchable PDF. An exportable version of the transcript or Insight Guide with embedded timestamps. Use it for sharing, archiving, or submitting alongside academic work.
| Output | Primary purpose | Best for |
|---|---|---|
| Clean transcript | Full verbatim record | Citation, archiving, search |
| SRT subtitles | Timed captions for video | Publishing, accessibility |
| Translated captions | Multilingual SRT | International audiences |
| Insight Guide | Structured study/research doc | Students, researchers, educators |
| Searchable PDF | Shareable, archived document | Submission, team sharing |
Pro Tip: Export both the SRT and the Insight Guide PDF from the same session. The SRT handles accessibility compliance; the PDF handles study and citation. Doing both takes 30 seconds and covers every downstream use case.
How automated transcription and Insight Guides are built
The pipeline has several distinct stages, and understanding them helps you predict where errors appear.
Audio capture feeds into an ASR (automatic speech recognition) engine, which converts speech to raw text. Punctuation restoration and timestamp alignment run next. For video files, multimodal signals like slide text overlays and on-screen graphics feed into the pipeline alongside the audio track, improving term recognition for technical content.
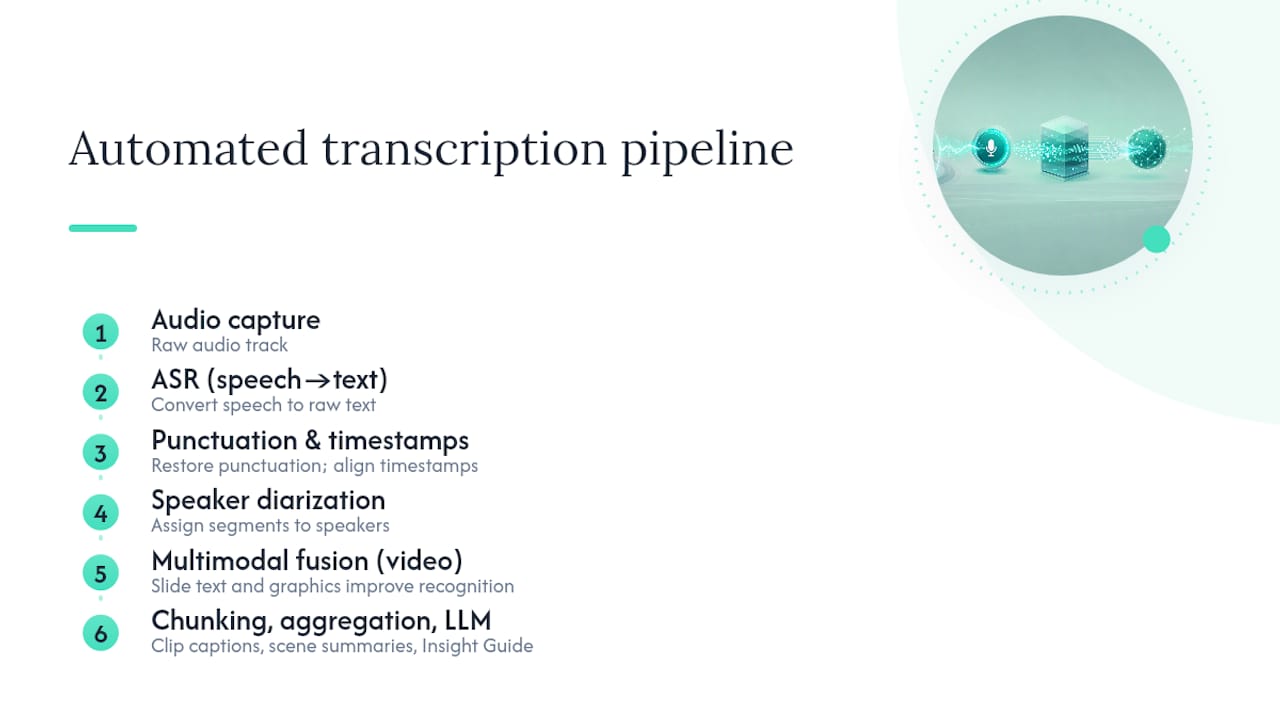
The transcript then gets chunked into segments. Long-form video research identifies chunking, hierarchical multi-granular representations, and streaming/incremental processing as necessary design choices for robust long-form understanding. Each chunk gets a clip-level caption, then scene-level summaries aggregate upward into a full summary. This bottom-up pipeline, recommended by practical long-context video guides, keeps token budgets manageable for hour-long recordings.
The LLM then structures the Insight Guide: concepts, key ideas, examples, important moments, and a synthesis. VideoAgent research shows that iterative retrieval over relevant chunks answers long-video questions more efficiently than processing every frame uniformly.
Chunking transcripts and aggregating chunk-level summaries yields better lecture summaries than single-pass summarization. Fine-tuning or few-shot prompts reduce repetition and improve style consistency across long recordings.
Pro Tip: For recordings over 45 minutes, split at natural chapter breaks before uploading. Aligned chunk boundaries reduce hallucination and keep timestamps accurate across the full document.
Recording and processing checklist for accurate transcripts
Audio quality is the single biggest variable in transcript accuracy. Fix it before you record.
Audio checklist:
-
Use a cardioid condenser or dynamic mic; avoid omnidirectional laptop mics
-
Record at 44.1 kHz / 16-bit minimum; 48 kHz is standard for video
-
Keep the room quiet: close windows, turn off HVAC, use acoustic panels if available
-
Position the mic 6–12 inches from the speaker's mouth
-
For remote speakers, ask them to use a wired headset and disable noise suppression in their conferencing app (it can clip consonants)
Processing checklist:
-
Set the correct source language before transcription starts
-
Enable punctuation restoration and sentence-boundary detection
-
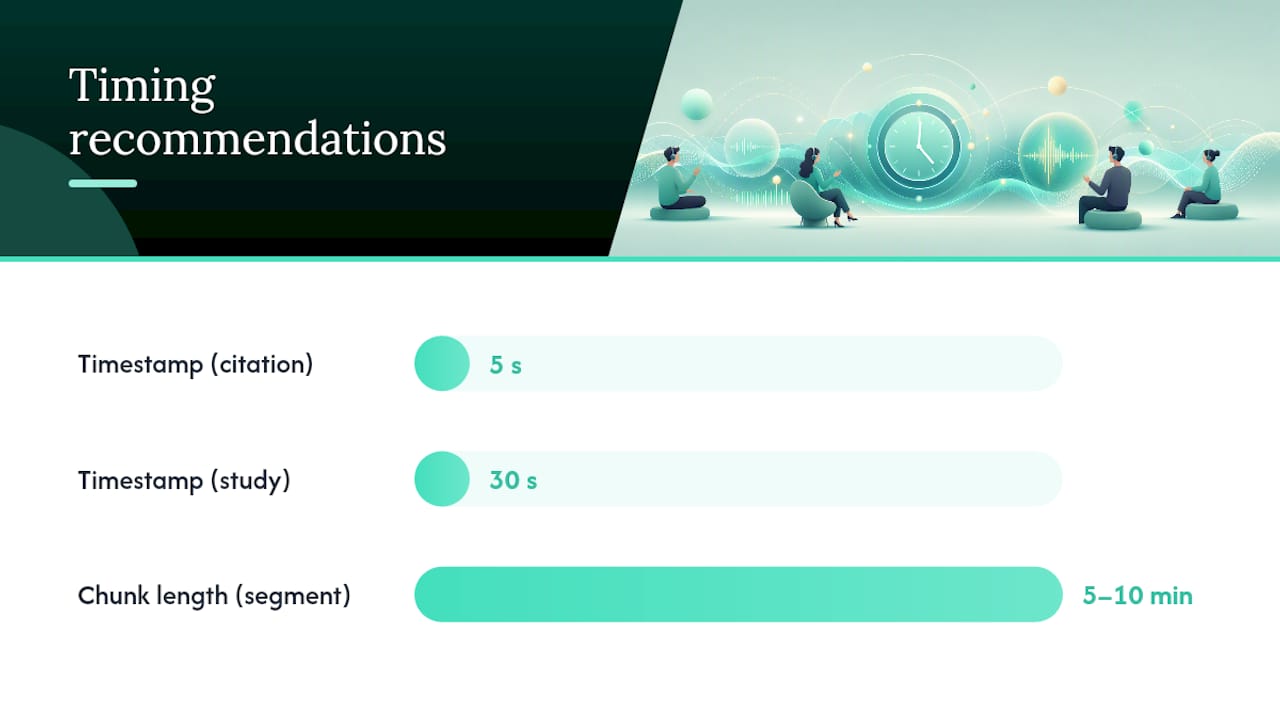
Set timestamp granularity to every 30 seconds for study use; every 5 seconds for clip-level citation
-
Upload a custom vocabulary list for domain-specific terms (medical, legal, technical)
The LONGVIDEOBENCH benchmark confirms that subtitle and ASR quality are critical for long-video understanding tasks, particularly when models must answer questions that require temporally aligned text and frames.
| Setting | Recommended value | Notes |
|---|---|---|
| Sample rate | 48 kHz | Standard for video; 44.1 kHz acceptable for audio-only |
| Bit depth | 16-bit minimum | 16-bit minimum for archival recordings |
| Timestamp interval | 30 sec (study) / 5 sec (citation) | Finer intervals increase file size |
| Chunk length | 5–10 min segments | Reduces hallucination on long recordings |
Pro Tip: Upload a custom glossary of domain terms before processing a technical lecture. ASR models default to common vocabulary; a glossary cuts substitution errors on jargon by a meaningful margin.
How to edit your transcript for publication or citation
A 5–15 minute human pass converts an AI draft into something you can actually submit or publish.
-
Skim the opening. Check the first 2 minutes for any obvious misheard words before you commit to a full pass.
-
Fix low-confidence spans. Most tools flag uncertain words. Correct these first; they are usually proper nouns, acronyms, or domain terms.
-
Check timestamps. Spot-check every 10 minutes. A drift of more than 2 seconds at any point means the chunk boundary shifted; correct it manually.
-
Correct domain terms. Cross-reference against your custom vocabulary list or the source slides.
-
Add citations. Insert inline timestamps as citation anchors (e.g., [Lecture 3, 14:22]) so reviewers can verify against the original recording.
-
Log every change. Use a version-controlled document or a change log with date, editor initials, and a brief note. This matters for academic citation integrity.
Academic research frames AI summaries as high-value study aids but emphasizes that educators must remain expert curators: humans add pedagogical structure and verify facts that automated systems miss.
Editing checklist by role:
-
Student: Correct proper nouns, add timestamp citations
-
TA: Verify factual claims against source material, check timestamp alignment
-
Researcher: Add literature citations, flag ambiguous statements, log all edits with version numbers
Pro Tip: Keep the original AI-generated transcript as version 1.0 and save your edited version as 1.1. If a reviewer questions a correction, you can show exactly what changed and why.
When does automated transcription fail?
Automated transcription degrades predictably. Knowing the failure modes lets you decide upfront whether to use a fully automated draft, a hybrid approach, or full human transcription.
Common failure modes:
-
Overlapping speakers. Diarization breaks down when two people speak simultaneously for more than 2–3 seconds.
-
Low signal-to-noise ratio. Recordings below roughly 20 dB SNR produce substitution errors that compound through the Insight Guide.
-
Heavy accents or non-native speech. ASR models trained primarily on standard American English underperform on strong regional or international accents.
-
Domain jargon without a custom vocabulary. Medical, legal, and highly technical content generates frequent substitutions.
-
Music or background audio. Even brief musical intros confuse ASR segment boundaries.
Decision rules:
-
Use a fully automated draft when audio is clean, speakers are distinct, and the content is general-audience.
-
Use hybrid editing (automated draft plus human QC pass) for technical lectures, research interviews, or any content going into published work.
-
Commission full human transcription for legal depositions, medical consultations, or any recording where a single error carries material consequences.
For long recordings, a single-pass summary loses nuance. Long-form video architecture research recommends multi-chapter Insight Guides over one monolithic summary for recordings over 30 minutes.
Pro Tip: *Before committing to automated transcription for a critical recording, run the first 5 minutes through the tool and calculate your word error rate manually against the source.
How to use an Insight Guide as a study or research tool
An Insight Guide is not a passive summary. Used actively, it functions as a complete study system.
Three ready templates:
Cornell-style Insight Guide. The guide's key concepts column maps to Cornell cues; the synthesis section maps to the summary box. After reading, cover the details column and try to reconstruct each concept from the cue alone. Education research on structured note-taking shows that active engagement with structured summaries, rather than passive reading, drives comprehension and exam preparation gains.
Timeline/event map. Use the timestamp anchors in the Insight Guide to build a chronological event map. Paste each key moment with its timestamp into a spreadsheet. This works well for historical lectures, case study walkthroughs, and documentary analysis.
Glossary + Q&A. Extract the domain terms from the Insight Guide's concepts section into a two-column glossary (term / definition). Then write one exam-style question per concept. This is the fastest path from a lecture recording to a retrieval-practice deck.
A study with about 100 university students found that automatic summaries paired with lecture videos improved pre-quiz performance in preview conditions versus video alone. The mechanism is straightforward: summaries reduce the cognitive load of identifying what matters before a first watch.
Mapping timestamps to citations:
-
Identify the claim you want to cite in the Insight Guide.
-
Find its timestamp anchor in the transcript.
-
Format as: Author/Speaker, Title of Recording, [timestamp], Platform, Date.
-
Attach the SRT file or PDF as a supplementary source so reviewers can verify.
U.S. privacy, consent, and copyright basics for recording
Recording and transcribing content in the United States carries legal obligations that vary by state, institution, and content type.
Consent checklist:
-
One-party vs. two-party consent. Federal law (the Electronic Communications Privacy Act) requires only one-party consent for recording, but 11 states require all-party consent. California, Florida, Illinois, and Washington are among them. Check your state before recording any conversation.
-
Classroom recordings. FERPA protects student educational records. A recording of a class session that captures identifiable student voices or images may constitute an educational record. Get institutional guidance before distributing classroom recordings.
-
Institutional policies. Most universities have explicit policies on recording lectures. Check your institution's academic technology or registrar's office before recording.
Copyright and fair use:
-
Transcribing a third-party video for personal study is generally low-risk. Publishing that transcript, even with attribution, may infringe copyright.
-
Educational fair use (17 U.S.C. § 107) permits limited use of copyrighted material for teaching, scholarship, and research, but it is a defense, not a blanket permission. Amount used, market impact, and commercial vs. nonprofit purpose all factor in.
-
When in doubt, request written permission from the rights holder before publishing any transcript excerpt.
Recording a class or meeting without disclosure, even in a one-party consent state, can violate institutional policy or professional ethics codes. Disclose recording at the start of every session.
Pro Tip: Add a one-sentence recording disclosure to your meeting invite or class syllabus: "This session may be recorded and transcribed for study and accessibility purposes." That single line covers most institutional and ethical requirements.
What to check in vendor pricing and plan limits
Pricing for automated transcription services varies more than the headline number suggests. These are the variables that actually determine your cost.
Pricing variables to check:
-
Monthly transcription minutes included in the base plan
-
Whether live-stream transcription counts against the same minute pool as batch uploads
-
Per-minute overage rate once you exceed the plan limit
-
Translation fees (per language, per minute, or flat per document)
-
Storage and retention limits (some plans delete transcripts after 30–90 days)
-
Export format availability (SRT, PDF, DOCX) by plan tier
-
Turnaround SLA for any human review add-on
For students: Pay-as-you-go plans work well for occasional lecture recordings. Look for plans with no monthly commitment and a low per-minute rate on short files.
For research labs: Subscription plans with high monthly minute caps and multi-seat access reduce per-unit cost significantly. Prioritize plans that include translation and custom vocabulary uploads, since research content is often multilingual and domain-specific.
Pricing checklist to copy into vendor quotes:
-
Base plan monthly minutes
-
Live vs. batch minute pooling
-
Per-minute overage rate
-
Translation cost per language per minute
-
Storage retention period
-
Export formats included
-
Human review add-on availability and SLA
How to measure transcript and Insight Guide quality
Measuring quality gives you a reproducible standard for deciding when a transcript is ready to publish or cite.
Key metrics:
Spot-check sampling process:
-
Select 3 random 2-minute segments from the transcript.
-
Compare word-for-word against the audio.
-
Count substitution, deletion, and insertion errors.
-
Calculate WER: (errors / total reference words) × 100.
-
If WER exceeds your threshold, flag the full transcript for a complete human pass.
For multi-editor datasets:
-
Assign each editor a separate segment to review independently.
-
Compare their corrections using inter-rater agreement (Cohen's kappa or simple percent agreement).
-
Resolve disagreements in a joint review session before finalizing the document.
VideoAgent research supports a two-round workflow: first pass for transcription and chunk-level summarization, second pass for retrieval of salient chunks and focused reasoning. Human editors then validate facts and add citations. This two-round approach consistently outperforms single-pass processing on long recordings.
What YumiLM has learned from using live transcription in teaching
A typical use case: capture a 60-minute lecture via live stream, run the transcript through YumiLM's Insight Guide generator, and hand the structured PDF to a TA for a 10-minute edit pass before the next class session. The TA corrects domain terms and adds timestamp citations. Students receive a Cornell-style study guide within two hours of the lecture ending.
The team roles that make this work are straightforward. The instructor focuses on delivery and flags any segments that need special attention. The TA owns the editing pass and version log. The Insight Guide goes out as a PDF with embedded timestamps so students can jump directly to any concept in the original recording.
The time saving is real. Rewatching a 60-minute lecture to build study notes takes 90 minutes or more. A reviewed Insight Guide from the same lecture takes 10–15 minutes to produce and covers the same ground more systematically.
YumiLM turns your recordings into structured study documents
YumiLM covers the entire workflow described in this article in a single tool: paste a YouTube URL, upload a file, or connect a live stream, and you get a timestamped transcript, SRT subtitles, translated captions, and a structured Insight Guide PDF without switching between apps.
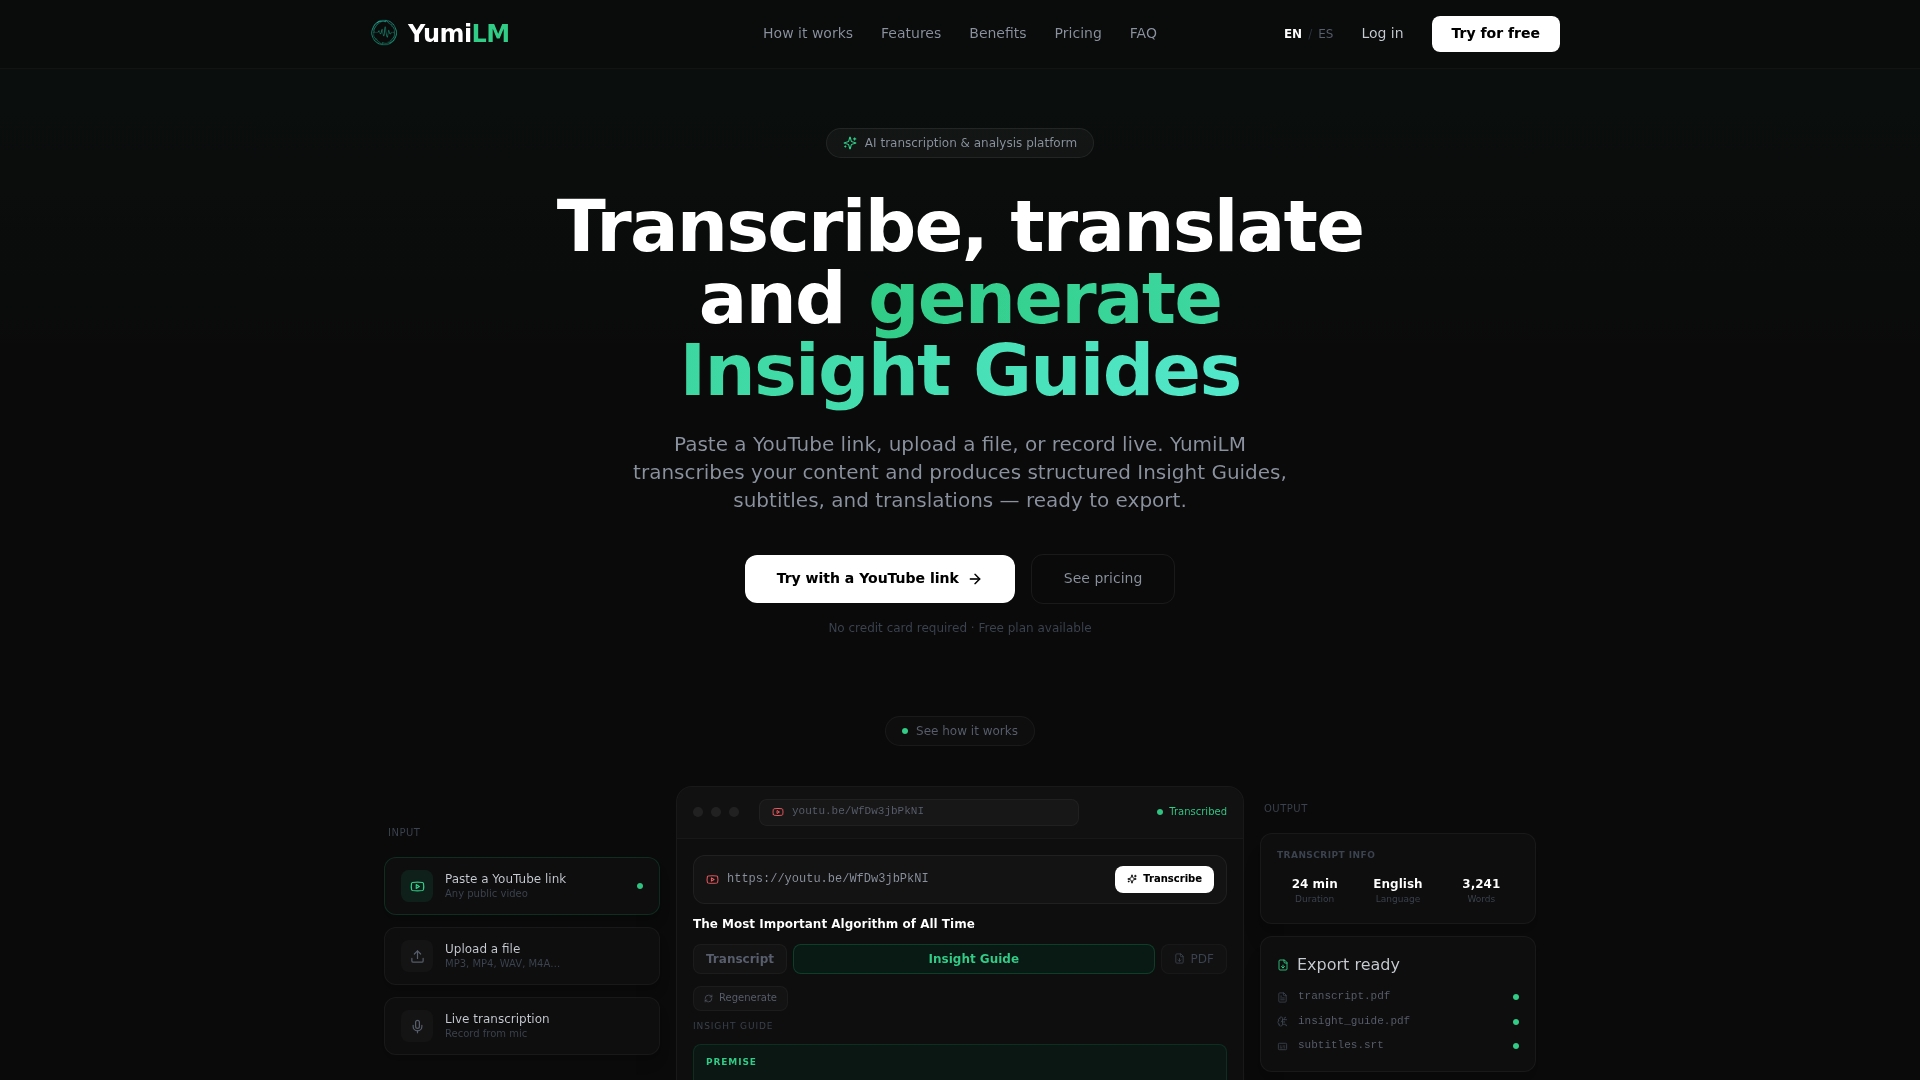
The Insight Guide is the part most tools skip. It organizes your recording into concepts, key moments, examples, and a synthesis section you can use as study notes, a research memo, or a content repurposing brief. For multilingual work, translation runs in the same session. Every output is exportable.
Start with a 10-minute clip on the Live Transcribe page or read the full AI transcription guide to see how the workflow maps to your use case.
Sources
-
Automatic summarization of lecture videos' transcripts (BEA 2023 paper)
-
Long-Form Video Understanding — architectures and benchmarks (arXiv)
-
LONGVIDEOBENCH: benchmarks for long video understanding (NeurIPS 2024 proceedings)
-
AI meeting bots: how Microsoft, Zoom, and Google are tightening controls | UC Today